
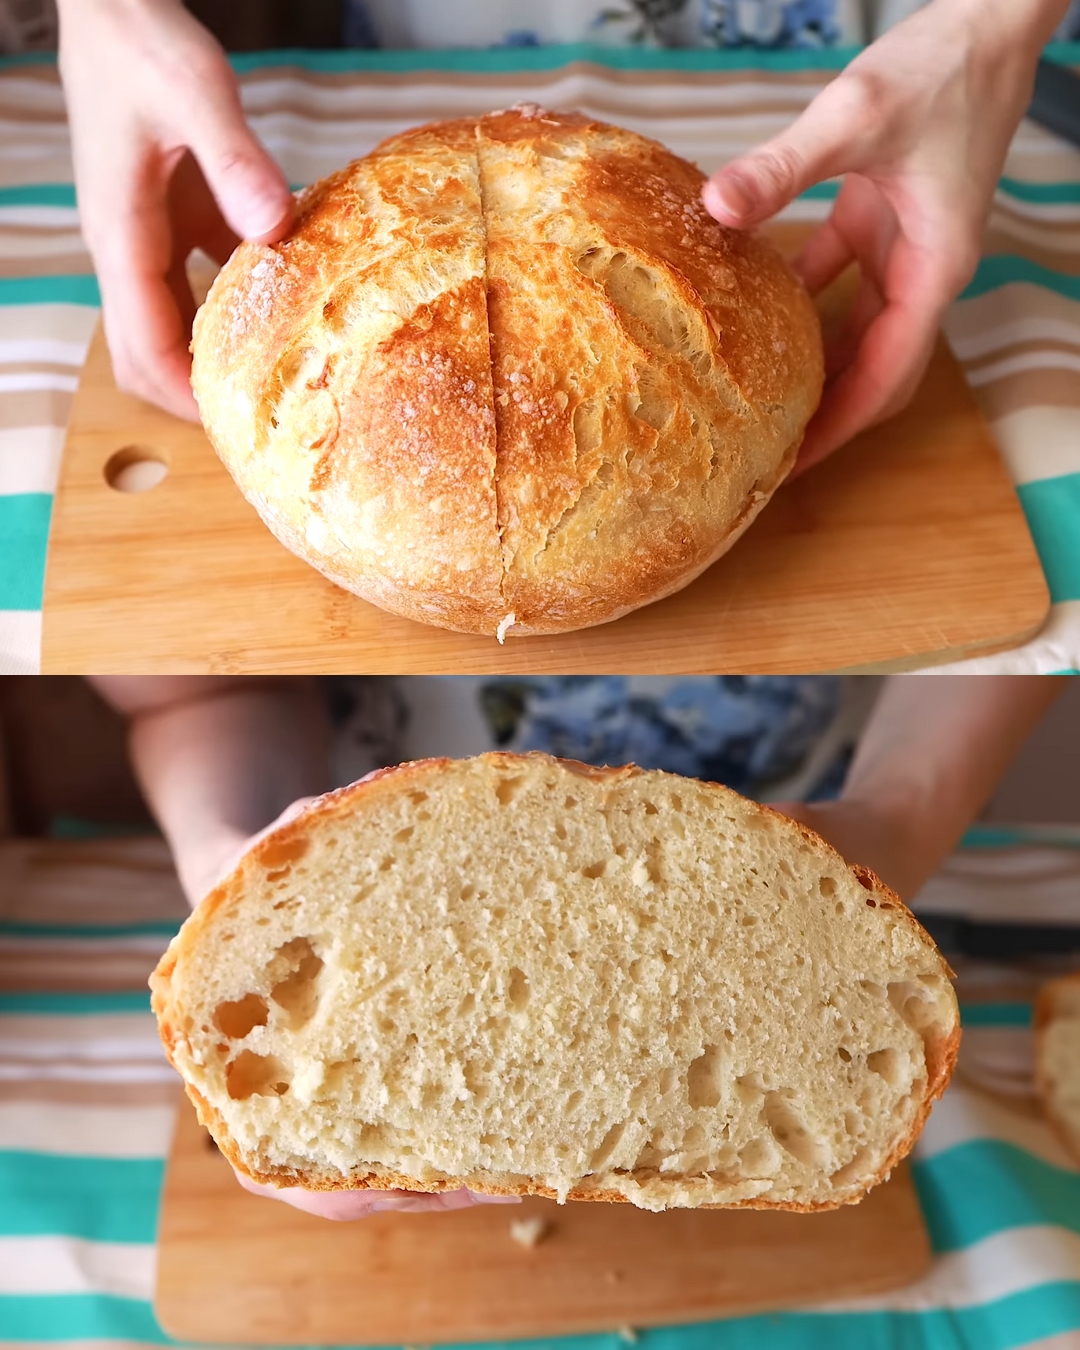
This Simple No-Knead Artisan Yeast Bread is the kind of recipe that transforms a handful of humble ingredients into a rustic, bakery-style loaf right in your own kitchen. With just warm water, flour, salt, and yeast, you can create a golden-brown crust, a tender open crumb, and that irresistible homemade bread aroma filling your home. The magic of this bread is in its simplicity—no mixer, no kneading, no fancy ingredients. All you need is time, a good Dutch oven or oven-safe pot with a lid, and a little patience.
Preparation Time: 10 minutes
Rising Time: 1–2 hours (or overnight for deeper flavor)
Cook Time: 45–50 minutes
Total Time: 2 hours 10 minutes – or overnight + baking time
Yield: 1 large loaf (8–10 slices)
Cuisine: Rustic European / Minimalist Baking
Ingredients
-
1 ½ cups warm water (370 ml)
-
2 tablespoons dry yeast (10 g)
-
4 cups all-purpose or bread flour (500 g)
-
1 teaspoon salt
Step-by-Step Cooking Directions
Activate the yeast
In a large mixing bowl, add warm water (about 100–110°F or 37–43°C). Sprinkle the dry yeast over the top and stir gently. Let it sit for 5–10 minutes until foamy. This indicates the yeast is active and ready to go.
Mix the dough
Add the flour and salt to the bowl with the activated yeast. Stir using a wooden spoon or spatula until a shaggy, sticky dough forms. There’s no need to knead—just mix until no dry flour remains.
Let it rise
Cover the bowl with plastic wrap or a clean kitchen towel and place it in a warm, draft-free area. Allow the dough to rise for about 1–2 hours, or until it doubles in size. For extra flavor and texture, you can refrigerate the dough overnight for a slow rise.
Preheat and shape
Place a Dutch oven or covered oven-safe pot in the oven and preheat to 220°C (428°F) for at least 30 minutes. Meanwhile, gently shape the dough into a round or oval loaf on a lightly floured surface. Avoid overhandling—it should remain soft and airy.
Bake with steam
Carefully remove the hot pot from the oven. Transfer the dough into the pot (you can use parchment paper to avoid sticking). Cover with the lid and bake for 30 minutes. This traps the steam and helps form a crispy crust.
Finish baking uncovered
After 30 minutes, remove the lid and continue baking for another 15–20 minutes. The loaf should turn golden brown with a crisp crust. Tap the bottom—it should sound hollow when done.
Cool and serve
Let the bread cool on a wire rack for at least 20–30 minutes before slicing. This resting time allows the interior to finish setting and avoids gummy slices.
Nutritional Information (per slice – based on 10 slices)
-
Calories: 160
-
Carbohydrates: 30g
-
Protein: 4g
-
Fat: 0.5g
-
Fiber: 1g
-
Sodium: 180mg
-
Sugar: 0g
-
Calcium: 1% DV
-
Iron: 10% DV
The Origins and Popularity of the Recipe
This style of bread is often referred to as “no-knead artisan bread,” a technique that gained popularity in the early 2000s thanks to renowned baker Jim Lahey. His method showed the world that delicious, bakery-quality bread could be made at home without expensive equipment or advanced baking skills.
The use of a Dutch oven creates the perfect baking environment—mimicking the steam injection of professional ovens and giving the bread its signature crispy crust and soft interior. Today, this technique has become a go-to for home bakers looking for reliable results with minimal effort.
Reasons Why You’ll Love the Recipe
-
Only 4 basic ingredients—flour, water, salt, yeast
-
No kneading or special tools needed
-
Golden crispy crust, soft open crumb inside
-
Customizable with seeds, herbs, or dried fruit
-
Budget-friendly and freezer-friendly
-
Impressively delicious with minimal hands-on work
-
Perfect for beginners and experienced bakers alike
Health Benefits
-
Simple ingredient list means fewer additives and preservatives than store-bought bread
-
Naturally vegan and dairy-free
-
Customizable for higher fiber or whole grain versions
-
Long fermentation option (overnight) enhances digestibility and flavor
-
Lower sugar and fat compared to enriched breads
This bread can be part of a healthy diet when paired with whole-food toppings like avocado, hummus, or lean protein.
Serving Suggestions
-
With butter and jam for a classic breakfast
-
As a side with soup or salad
-
Toasted with avocado and chili flakes
-
Turned into bruschetta with tomatoes and herbs
-
Used for sandwiches or grilled cheese
-
Dipped in olive oil and balsamic vinegar
This bread’s neutral flavor makes it perfect for sweet or savory pairings.
Cooking Tips
-
Use a hot Dutch oven for best crust development
-
Don’t skip the preheating—a hot pot = a better rise
-
Let the dough rise fully before baking—don’t rush this step
-
Use parchment paper to easily lift and transfer dough
-
Cool before slicing—cutting too early causes a gummy texture
-
For extra crispy crust, crack the oven door slightly during the last 5 minutes of baking
Variations to Try
-
Add 1 tsp herbs (rosemary, thyme, oregano) for an herbed loaf
-
Use half whole wheat flour for more fiber and a nutty flavor
-
Mix in ¼ cup of seeds like flaxseed, chia, or sunflower
-
Add chopped olives or roasted garlic for a Mediterranean twist
-
Top with sesame seeds or oats before baking for texture
-
Sweet version: add raisins and cinnamon for a breakfast bread
Conclusion
This Simple No-Knead Yeast Bread is the kind of recipe that proves baking doesn’t have to be complicated. With a crispy crust, chewy interior, and minimal ingredients, it delivers maximum reward for minimal effort. Whether you’re a first-time baker or a seasoned home cook looking for a foolproof go-to bread, this recipe checks all the boxes: reliable, rustic, and ridiculously good.
FAQ
1. Can I make the dough ahead of time?
Yes! After the initial mix, cover and refrigerate overnight for deeper flavor. Let it come to room temperature before baking.
2. What kind of pot should I use?
A Dutch oven or any oven-safe pot with a lid will work. Cast iron is ideal.
3. Can I use instant yeast instead of dry yeast?
Yes, use the same amount. No need to activate it—just mix it with the dry ingredients.
4. What if I don’t have a Dutch oven?
You can bake on a baking sheet with a pan of hot water in the oven to create steam.
5. How do I know the bread is done?
It should be golden brown, sound hollow when tapped, and register 190–200°F (88–93°C) internally.
6. Can I freeze the bread?
Yes! Once cooled, slice and freeze in portions. Reheat in the toaster or oven.
7. Why didn’t my bread rise?
Your yeast may be expired, or the water was too hot/cold. Make sure your environment is warm enough for rising.
8. Can I add sugar to the dough?
Yes—1 tablespoon of sugar or honey adds a touch of sweetness and helps yeast activate faster.
9. How can I make this gluten-free?
Use a gluten-free bread flour blend. Results may vary, but the technique remains similar.
10. What’s the best flour to use?
All-purpose flour works great, but bread flour gives a chewier texture and better structure.